Using color and image swatches provides a much nicer way to display variations of a product, available styles, available sizes, or pretty much anything else you can display using an image or color.
Shoppers appreciate visual representations of product attributes when using your store, and it can help present a polished and clean look. WooCommerce Color and Image swatches is the answer if you are looking to edge out the competition.
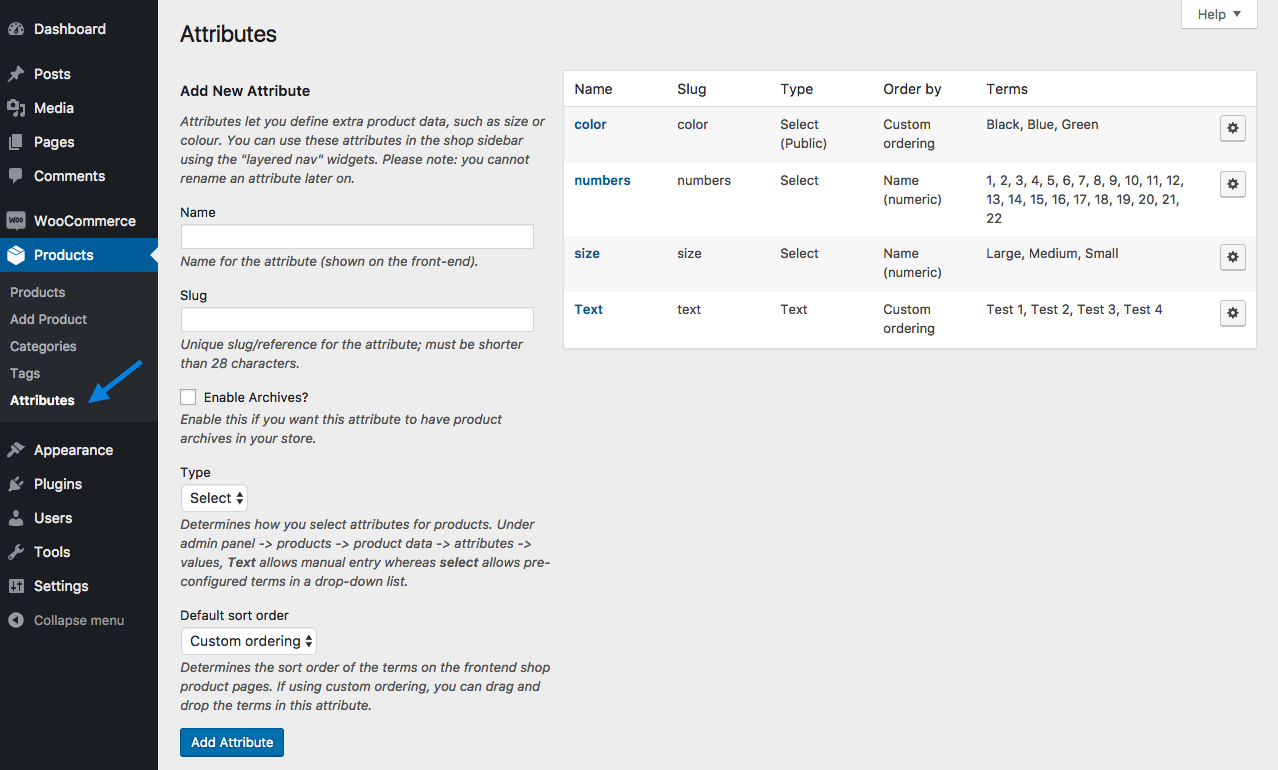
The admin interface allows you define colors and images at attribute level or product level:
2. Create a new attribute, or skip this step if you already have one.
3. Select the gear icon on the right next to the attribute. When you hover over this icon, you’ll see “Configure terms”.
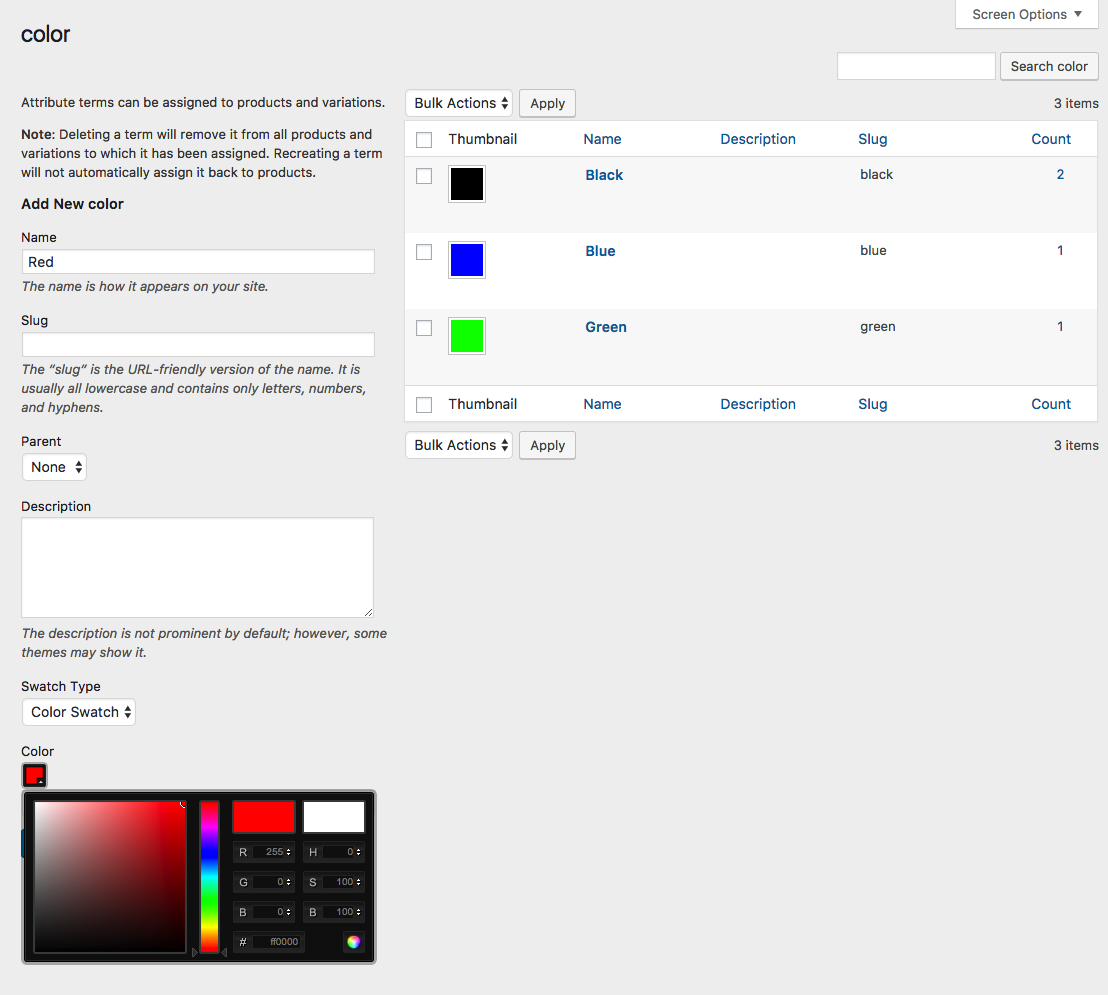
4. Add New Color or whatever your attribute is called (or choose to edit an existing term).
5. Select either “Color” or “Image” in the Swatch Type dropdown.
If you’ve chosen color, you’ll be able to click on the color icon and select the color you want to use in the color picker. Alternatively, you can type in the HEX value for the color.
If you’ve chosen image, you’ll be able to upload an image.
8. Select Add New Color.
For more information about setting up and managing Global Product Attributes, see: Managing Attributes.
Warning: If you change the attribute name and/or slug you permanently lose the swatches configuration.
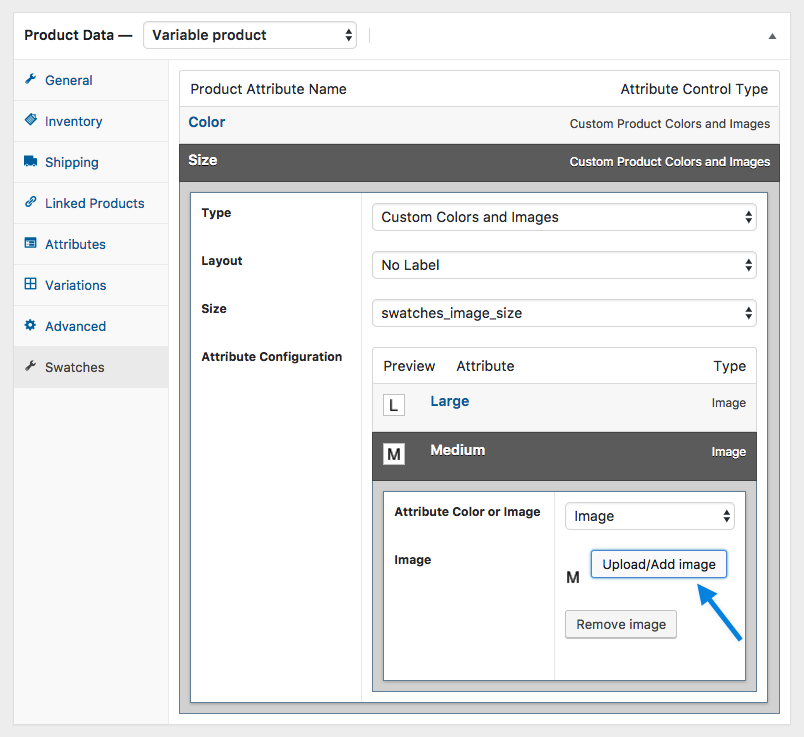
Color and photo swatches can only be used for variable products.
1. Create a variable product. Make sure that you select a global attribute or create a custom one in the “Attributes” tab. Also set up the “Variations” tab. More information about that can be found here:
2. Publish your product.
3. Go to the Swatches tab.
4. Select a “Type” for each of the attributes used for the variations.
None. The options will be offered in a dropdown.
Taxonomy Colors and Images. The options of the global attribute will be offered. (Only available for global attributes.)
Custom Colors and Images. You will be able to add colors and image swatches.
Radio Buttons. The available options will be displayed as radio buttons.
5. Choose whether to add a label or not and where to add it, if you’ve selected “Taxonomy Colors and Images” or “Custom Colors and Images”. This label will display the name of the selected term.
6. Select the size of the swatches if you’ve selected “Custom Colors and Images”. This will determine how large the swatches will be on the product page.
7. Configure the attribute terms. This is similar to how global attribute terms are configured (see above).
The files should be placed in: /yourtheme/woocommerce-swatches/single-product/variable.php.
Note: Since version 2.0, template overrides are no longer available. Instead, you will need to hook into the filters available in the MARKDOWN_HASH89049907faac3cec5af2f0a5e2fb900fMARKDOWN_HASH file.
Why is the main picture of my product not changing while selecting variations?
WooCommerce Variation Swatches and Photos extension allows you to put pictures or colors for each attribute. However, it does not change the main product image.
To change the main product image, you need to navigate to your variations options and upload a picture for each variation. It works this way because let’s say you have two attributes used for variations: Color and design for a t-shirt. You would use Variation Swatches and Photos for the color attribute displaying the color. The design attribute is used for the t-shirt itself. If a color and design is selected, you need an image for variation that shows the t-shirt design and selected color combined.
Why are my swatches not saving?
The Variation Swatches and Photos extension does not save swatches or photos after approximately 30 values (this number is based on the system and varies). Contact your hosting provider to increase max_input_vars. This happens frequently, if you have a product with a lot of variations.


0 Comments:
Post a Comment
Note: only a member of this blog may post a comment.
Subscribe to Post Comments [Atom]
<< Home