WooCommerce Storefront Powerpack 1.4.0 Extension
WooCommerce Storefront Powerpack 1.4.0 Extension
Download
http://getlot.co/shop/woocommerce-storefront-powerpack-extension/
Get it now


Download
http://getlot.co/shop/woocommerce-storefront-powerpack-extension/
Get it now
Customize Storefront from top to bottom, all without editing any code
Customizing your theme has long been a hassle that no one enjoys undertaking. With Storefront Powerpack, you can change all that.
Powerpack gives you the ability to customize and style nearly every aspect of Storefront without ever touching any code. Change your store’s header layout, tweak colors, fonts and layouts of almost any element, change text, checkout flow and more. Preview your changes instantly in the Customizer. Make changes to a single product page or on a global scale — it’s all up to you.
Powerpack is compatible with all Storefront Child Themes.
Powerpack features
Header layout configurator
Easily add or remove header components such as the logo, cart and navigation. Then simply drag and drop to arrange the layout.
Toggle between checkout options
Switch between various checkout layouts, toggle ‘distraction free’ more and other options designed to boost your sales.
Edit product page configurations globally
Hide unwanted text boxes or tabs, change the appearance of your image gallery and much more.
Add style and customize the appearance of your store
Point and click to select elements and style them in real time. Adjust typography (Google fonts included), colors, margin, padding, and more.
Edit your homepage on the fly
Update your homepage’s text, buttons and layout from a simple and familiar editor.
Style anything
From structural elements like the main site container, to buttons and products, Storefront’s appearance is completely under your control.
A brief demonstration of Powerpack’s features
You can see how Powerpack works as we create a Storefront style inspired by the ASOS clothing brand.
Storefront Powerpack
The Storefront Powerpack extension gives you creative control of style and layout options for your Storefront theme. No code knowledge is required, and changes are shown instantly.
Note: Storefront is required to use Storefront Powerpack. Storefront Powerpack is a combination of the previously offered WooCommerce Designer, Storefront Designer, and Storefront Checkout Customizer extensions, plus brand new functionality and features.
- Download the free Storefront theme. Or activate Storefront if you already have it installed, and skip to step 4.
- Go to: Appearance > Add New > Upload Theme and use Choose File to select the .zip file.
- Install Now and Activate the Storefront theme.
- Download the Storefront Powerpack .zip file from your WooCommerce account.
- Go to: WordPress Admin > Plugins > Add New and Upload Plugin with the file you downloaded with Choose File.
- Install Now and Activate the extension.
More information at: Installing and Managing Plugins.
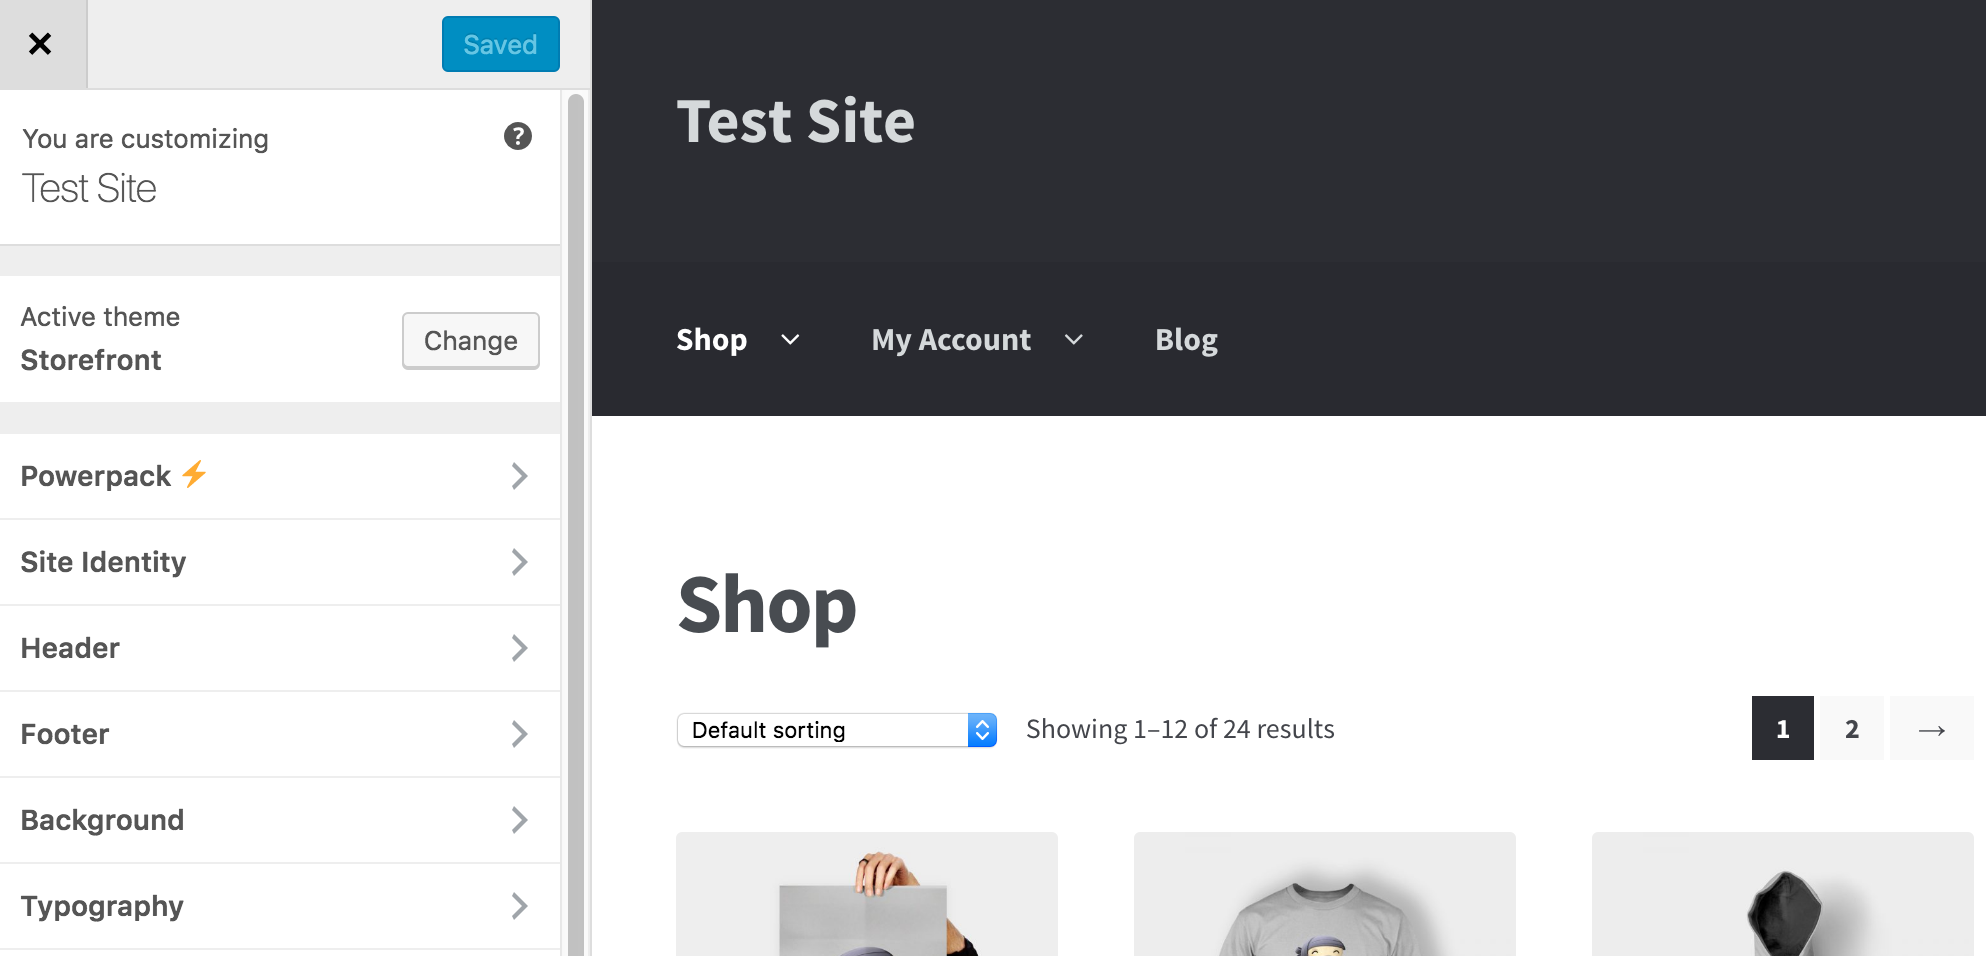
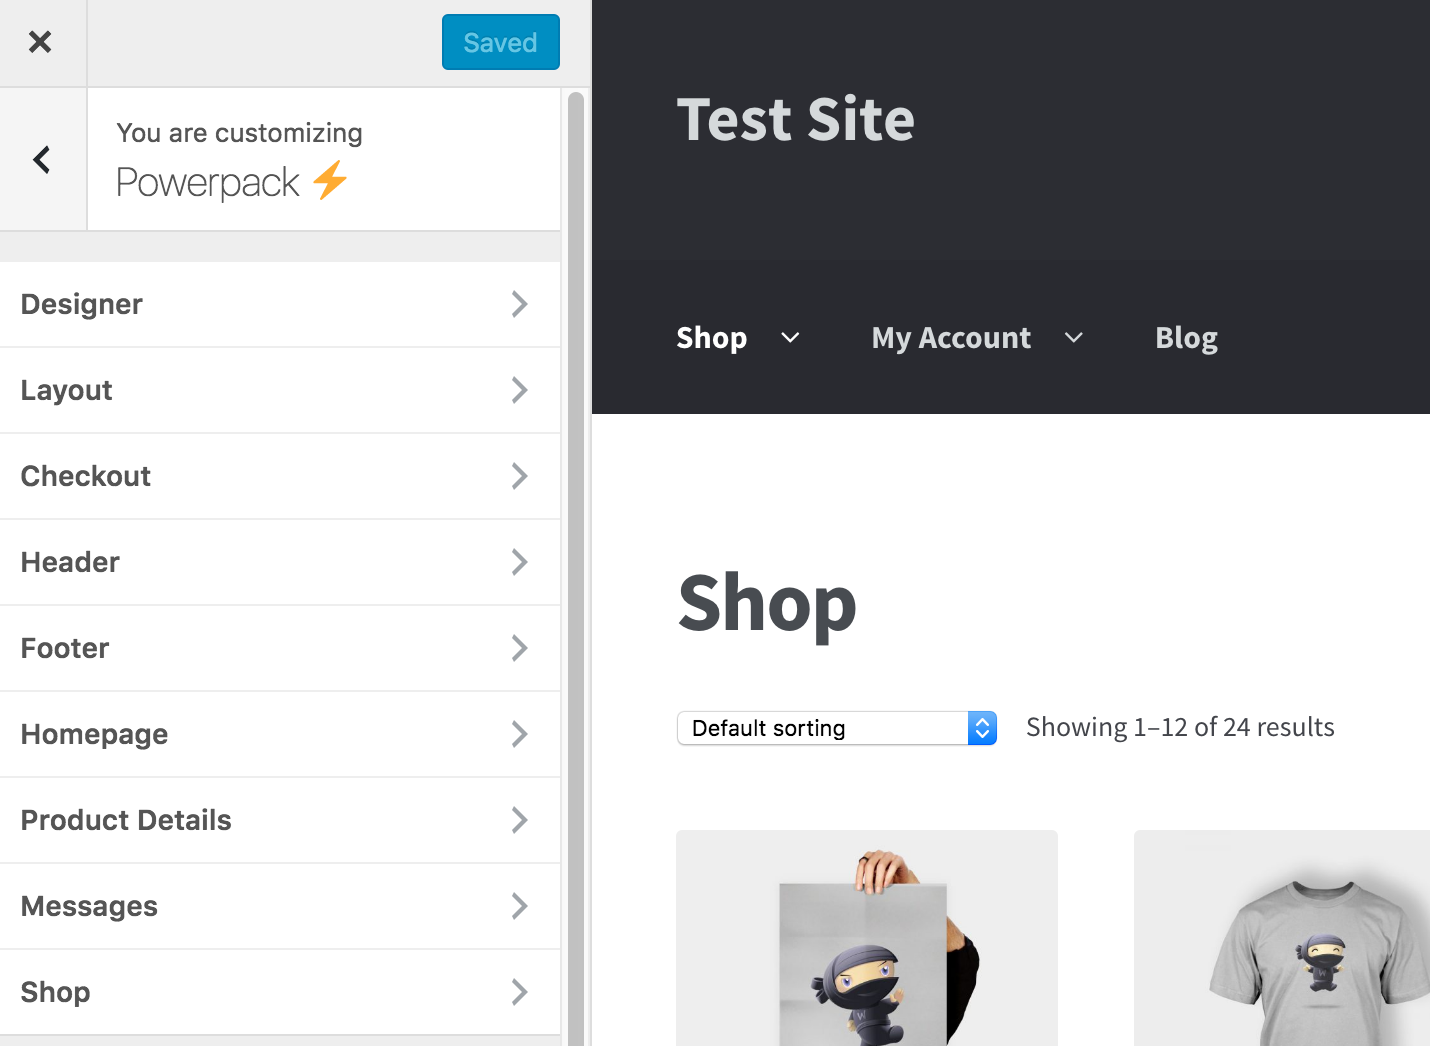
Storefront Powerpack integrates with the WordPress Customizer, using a familiar menu and adding a new top-level section called Powerpack .
.
.- Go to: Appearance > Customize.
- Select Powerpack, and a new menu will open.
Settings are self-explanatory, but we’ll go through each in sections below.
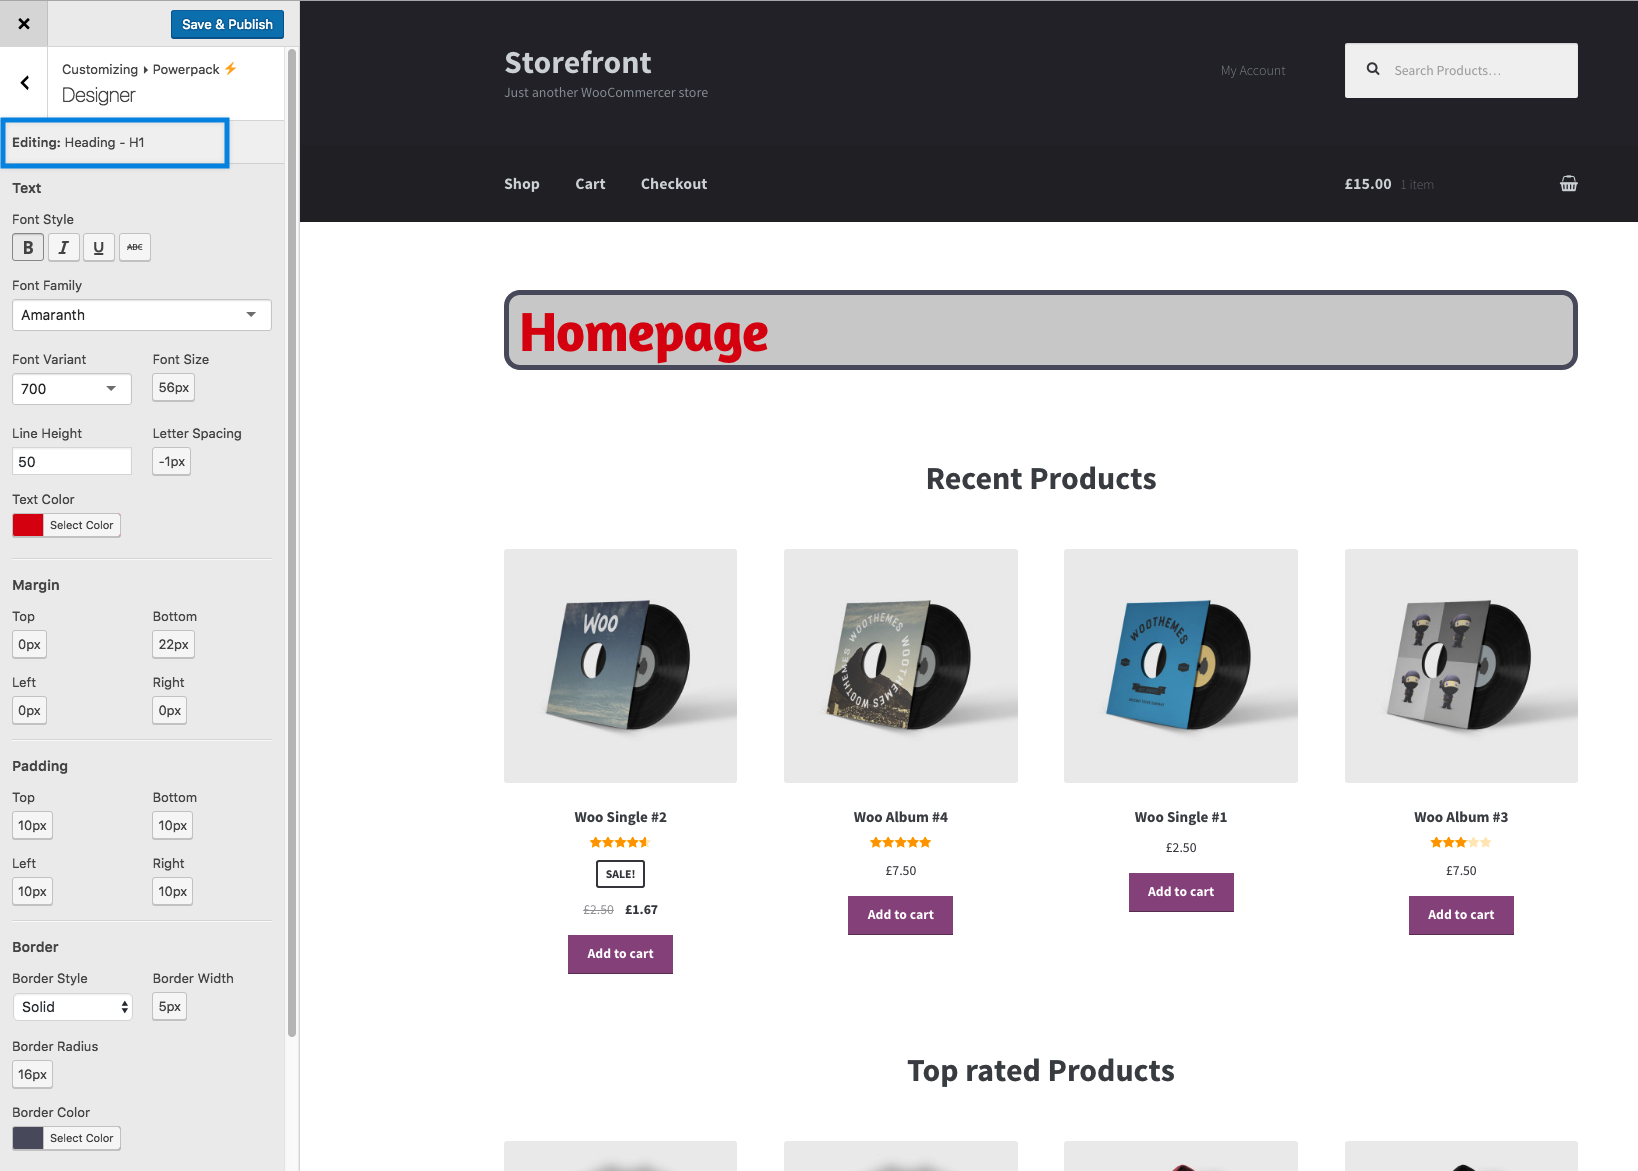
Designer is a point&click interface to change CSS styling of specific elements on a Storefront site.
1. Click the + Add a Style button.
2. Hover over any item on the page and select which you’d like to change.
3. Use the new left menu that opens to tweak:
- Font Style
- Font Family (Google Fonts)
- Font Variant
- Font Size
- Line Height
- Letter Spacing
- Text Color
- Margin
- Padding
- Border
- Background
Don’t forget to Save and Publish.
Repeat the steps above for each element you’d like to style, or edit anything you’d like to change again.
Layout settings allow you to set page width and use a content frame.
- Page layout – Default or stretch to maximum width.
- Content frame – Default or a window to display content. If selected, an option appears to set a background color. Can be selected to highlight products, sales and promotions or important text.
Don’t forget to Save and Publish.

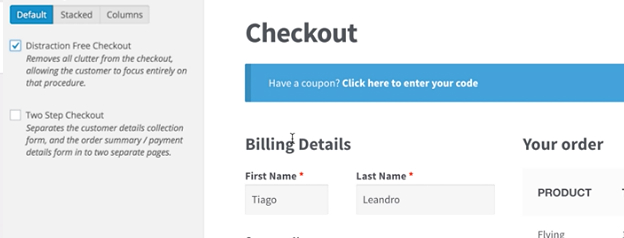
Here you can select or change the layout for checkout. Options are:
- Default — Customer input is on left, order is on right.
- Stacked – Customer input is above and order is below.
- Columns – Customer input and order, each divided into two columns.
Combined with the full-width template already in Storefront, this allows you to create six different checkout designs.
Select the type of layout you wish customers to use in checkout.
- Distraction-Free: Allows the customer to focus on checkout and payment. Removes most header elements, widgets, breadcrumbs and footer content. Note: If enabled, layout will automatically be Stacked.
- Two-Step: Enables the two-step checkout that separates the input of customer details / payment details into two pages.
- Sticky Order Review (Default): Keeps order on top. Place Order is visible as user scrolls down page. Note: Automatically disabled if Two-Step or Distraction-Free is selected.
Don’t forget to Save and Publish after making your selection.
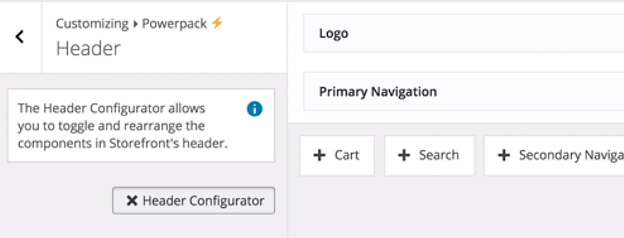
The Header Customizer allows you to toggle and rearrange components.
- Click the + Customize Header button. A new panel opens to display five components: Logo, Cart, Search, Primary Navigation, and Secondary Navigation.
- Add components you want to use and style by selecting the + icon next to each.
- Resize a component by hovering over the corner/borders and drag to change width.
- Move by click/hold and dragging to new location.
- Save and Publish.
Gives you the option to lock the entire header to the top of the page as the user scrolls.
Choose whether to enable or disable the footer bar on devices with smaller screens. If enabled, a sticky bar with links to the user’s account, search, and the shopping cart will be shown.
These settings only affect a page using the homepage template. If your WooCommerce store doesn’t have a static homepage, skip this section.
The left menu shows a number of options you can enable/disable and customize.
- Page content and title
- Product categories
- Product category title
- Product category columns and how many categories to display
- Recent products
- Recent product title
- Recent product columns and how many products to display
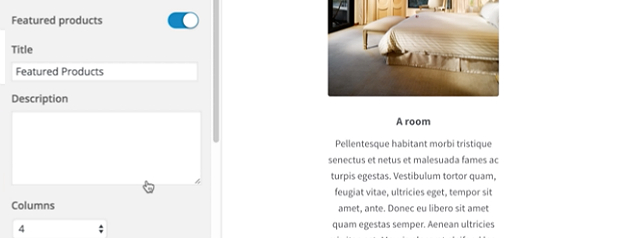
- Featured products
- Featured product title
- Featured product columns and how many products to display
- Top rated products
- Top rated product title
- Top rated product columns and how many products to display
- Sale products
- Sale product title
- On sale product columns and how many products to display
Don’t forget to Save and Publish.
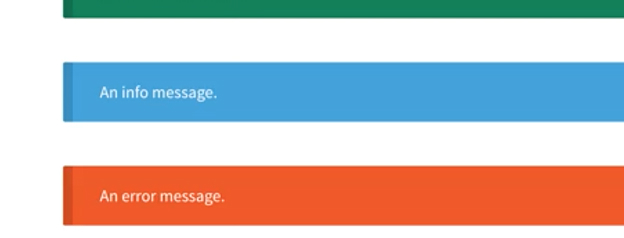
Settings allow you to customize the background/text colors used in WooCommerce informational messages.
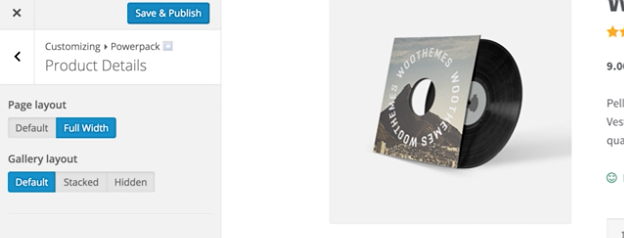
Settings allow you to change layout and customize every element of the product page.
- Page layout: Default or Full Width.
- Gallery layout
- Default. Product image/gallery on left and description on right.
- Stacked. Product image/gallery on top and product description on bottom.
- Hide product galleries. Disabled product image/gallery.
- Display Product Tabs. Enable/disable product tabs
- Display related products. Enable/disable related products.
- Display product description. Enable/disable product description.
- Display product meta. Enable/disable product meta.
Don’t forget to Save and Publish.
Settings control and customize elements on your Shop page.
- Page layout. Default or Full Width.
- Description. Above or below the products list.
- Columns. Number of columns for products on shop page and archives.
- Products per page. Number of products on shop page and archives.
- Content alignment. Align product components right, left or center, e.g., product image, title, rating, price, add to cart button, sale marker.
- Display product results count for shop page and product archives.
- Display product sorting for shop page and product archives.
- Display product image for shop page and product archives.
- Display product title for shop page and product archives.
- Display sale flash on shop page and product archives.
- Display rating on shop page and product archives.
- Display price on shop page and product archives.
- Display add to cart button on shop page and product archives.
Don’t forget to Save and Publish.
posted by Unknown @ 16:49
0 Comments
![]()

0 Comments:
Post a Comment
Note: only a member of this blog may post a comment.
Subscribe to Post Comments [Atom]
<< Home