Box Office for WooCommerce allows you to create and sell tickets directly to customers — no need for them to visit or use a third-party site or service anymore! Get ticket sales for your next event or conference up and running within minutes and start making additional income today.
With Box Office, you can create an ‘event’ product and sell it directly in your store, keeping your customers onsite.
Connect with attendees
Add custom fields to signup forms to learn more about attendees and personalize their experience. Customize emails sent after a ticket purchase and send bulk emails to attendees.
Attendee CSV export
Download a CSV export for all ticket holders based on ticket type.
Ticket inventory management
Automate ticket sales by setting individual ticket limits for each ticket you create and ensure that you don’t oversell tickets for a certain event or ticket type on your site.
Offer multiple ticket types
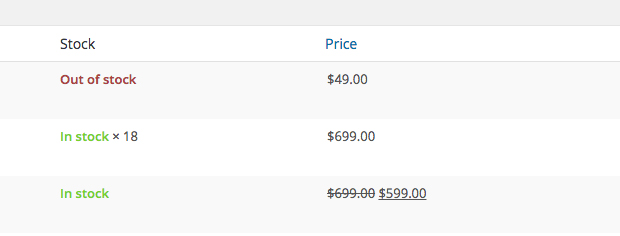
Create unlimited ticket types, each with their own pricing, benefits and/or private content, and manage stock levels independently.
Restrict content to ticket holders
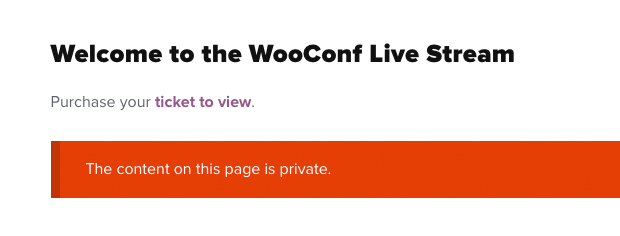
Do you want to offer a private webinar, a live-stream of your event or give your attendees access to downloadable content after the event? It’s all possible with Box Office.
Find attendees with ease
Search for attendees by name, ticket ID, email or even company.
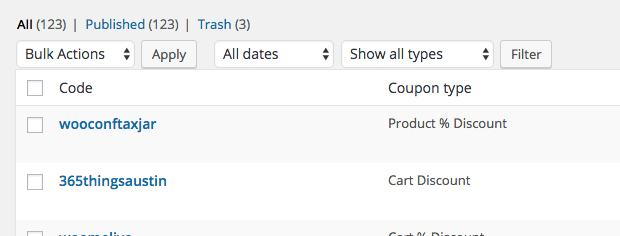
Offer discount codes
Offer coupon codes to event partners and sponsors to help drive ticket sales and easily track and manage coupon usage from your WooCommerce admin dashboard.
Box Office integrates with the WooCommerce Order Barcodes extension, allowing you to print a unique barcode within your customer’s ticket which allowing you to easily manage and track your events attendance.
WooCommerce allows you to set up any product to function as a ticket by creating a virtual product, but excludes ability to manage tickets. Box Office bridges that gap.
Manage tickets for as many events as you wish
Generate tickets that can have specific ticket-holder information attached
Collect info on individual ticket-holders
Allowing ticket-holders to manage their own info, regardless if they made the purchase
Send custom printable tickets
Bulk-email ticket-holders
Export ticket-holder info to a CSV document
Use Order Barcodes (separate purchase) to generate unique, scannable barcodes for each ticket
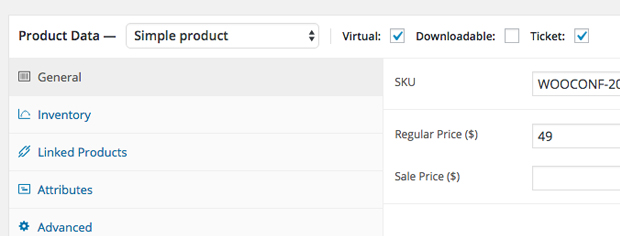
Tickets start with creating a product, or editing an existing product in WooCommerce, then ticking a checkbox to designate as a ticket.
Go to: WooCommerce > Products.
Click Add Product to add a new product. Or open an existing product. More info at: Adding and Managing Products.
Scroll down to the Product Data section, and tick the Ticket box.
Ticket option
Any product — simple, variable, physical, digital — designated as a ticket is unique.
For example: If an order is placed for 10 products, then 10 tickets are generated. The purchaser can edit each ticket and, by adding an email address to the ticket, send to each ticket-holder to view, edit and print.
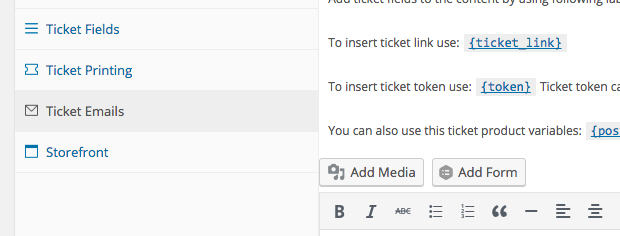
4. Go to new ticket tabs made available in product data.
Next sections cover Ticket Fields, Ticket Printing and Ticket Emails. This is where you customize tickets and decide what info to gather on each ticket-holder, what printed tickets look like, and what emails they receive.
Ticket fields are questions you ask each ticket-holder. It can be anything from their name to dietary requirements or any question unique to your event. Here are ticket fields we created for WooConf 2016:
Name, email address, URL and Twitter fields are all standard text fields, and ticket-holder info is validated according to type.
Auto-fill, Contact, Required and other Options
For each field, you can choose:
Auto-Fill – Automatically pulls values from billing info and assists in gathering ticket info without purchaser input, making checkout smoother.
Drop down menu, radio buttons, checkbox(es) – Allows you to supply a comma-separated list of options to ticket-holders.
Email address fields – Can specify Yes/No if (a) the email address supplied by the ticket-holder should be used as the contact email address and if ticket emails are sent to that address; and (b) the email address should be used to source the ticket-holder’s Gravatar. The Gravatar is used in the [tickets] shortcode (see ‘Shortcodes’ section below).
Required – Make it a required or optional field to complete.
Tick the box if you want tickets to be printable by the ticket-holder. Using the editor, you have full control of ticket design by adding, deleting and reordering ticket fields/labels you specified in Ticket Fields.
Content of the ‘Ticket Printing’ tab
Once you have enabled printing and decided on ticket content, a ‘print ticket’ button becomes available on the ticket page for all ticket-holders.
Tick the box if you want ticket emails sent to the contact email address whenever a ticket is updated (more below). Using the editor, you have full control of email content by entering a subject and adding, deleting and reordering the fields/labels you specified in Ticket Fields.
Content of the ‘Ticket Emails’ tab
Info will be pulled from purchaser/ticket-holder input.
Selling tickets is the same as selling a normal product in WooCommerce.
On the single product page, a form is displayed based on ticket fields you defined:
Ticket form on single product page
Updating quantity also updates the ticket form. For example: Changing the quantity to 2 will display two ticket forms — Ticket #1 and Ticket #2. Fields with auto-fill will already have data in them if the customer is logged-in.
In each location, there is a link to the ticket edit page where it’s possible to alter info. The URL follows this format: http://www.example.com/?ticket=edit&token=XXXXXXXXXXXXXXXXXXX
Each URL is unique to the ticket. While publicly accessible, the URL is only shared with the purchaser and then the purchaser can choose to share or not.
Ticket-holders can edit tickets by accessing the unique URL.
Ticket purchaser can edit the ticket details
Ticket purchaser can change the email address, and then the new email address is sent the email created for this ticket (see ‘Ticket Emails’ section above). Email is only sent if the email address is different from the previously saved email address. Ticket-holder can then edit his/her own details via the URL.
You can set up an automated, one-off email as mentioned above.
You can also send specific emails to all ticket-holders.
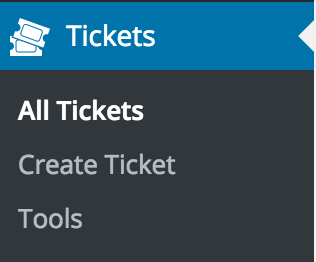
Go to: Tickets > Tools.
Open the ‘Email’ tab.
Select which ticket product you want to email.
Enter a subject line and content using the familiar WordPress content editor:
Ticket email tool
5. Preview or click “Send to all ticket holders” if you’re ready. A job is then put in the queue, and batches are sent every 10 minutes.
Previously sent emails appear in a table below the email editor.
Previously sent emails table
In this table you can view email subjects, which ticket products were targeted, how many email addresses were targeted, and how many mails were sent. You can also click the email subject to see the email log.
Exporting tickets
The ability to export tickets is useful for record-keeping, accounting, reports and lists.
Go to: Tickets > Tools.
Open the ‘Export’ tab.
Box Office export tool
3. Select which tickets you want to export from the dropdown. By default they are all selected.
4. Click the ‘Download Export File’ button. This creates a CSV file of all fields for selected tickets. The CSV also contains:
Ticket ID
Ticket status
Name of ticket
Ticket edit URL
Date of purchase
Order ID
User ID of purchaser
Tickets fields you defined in the product
This CSV may also be used import ticket data in another system (such as a newsletter service) or used as dynamic data to print out name badges.
The ability to get a top-level view of the total number of tickets sold to date, per event/product, is possible within the Reports screen of WooCommerce.
Go to: WooCommerce >Reports.
Click on the Tickets tab.
Scanning tickets
This option requires the purchase and activation of Order Barcodes (separate extension).
Use the [scan_ticket] shortcode in a post/page to produce a scan ticket form.
Scan ticket form with [scan_ticket] shortcodeThe form allows you to look up the ticket-holder and mark him/her as attended via ticket barcode. More info at Order Barcodes documentation on how to use the barcode scan device.
Explanation for the [scan_ticket] shortcode is described in Shortcodes below.
avatar_size — Size of avatar to display. Default is 96.
columns — Number of columns in grid. Default is 3.
Display all tickets from product(s)
[scan_ticket]
action — Default action to select. Can be “lookup” or “attended”
Display form for scanning ticket barcode.
[ticket_private_content]
product_id — Ticket product ID.
Hide content between [ticket_private_content] and [/ticket_private_content] if ticket token is unavailable in the URL. Token is passed as query arg token.


![Scan ticket form using [scan_ticket] shortcode](https://docs.woocommerce.com/wp-content/uploads/2016/04/Screen-Shot-2016-04-20-at-5.25.21-PM.png?w=550)

0 Comments:
Post a Comment
Note: only a member of this blog may post a comment.
Subscribe to Post Comments [Atom]
<< Home